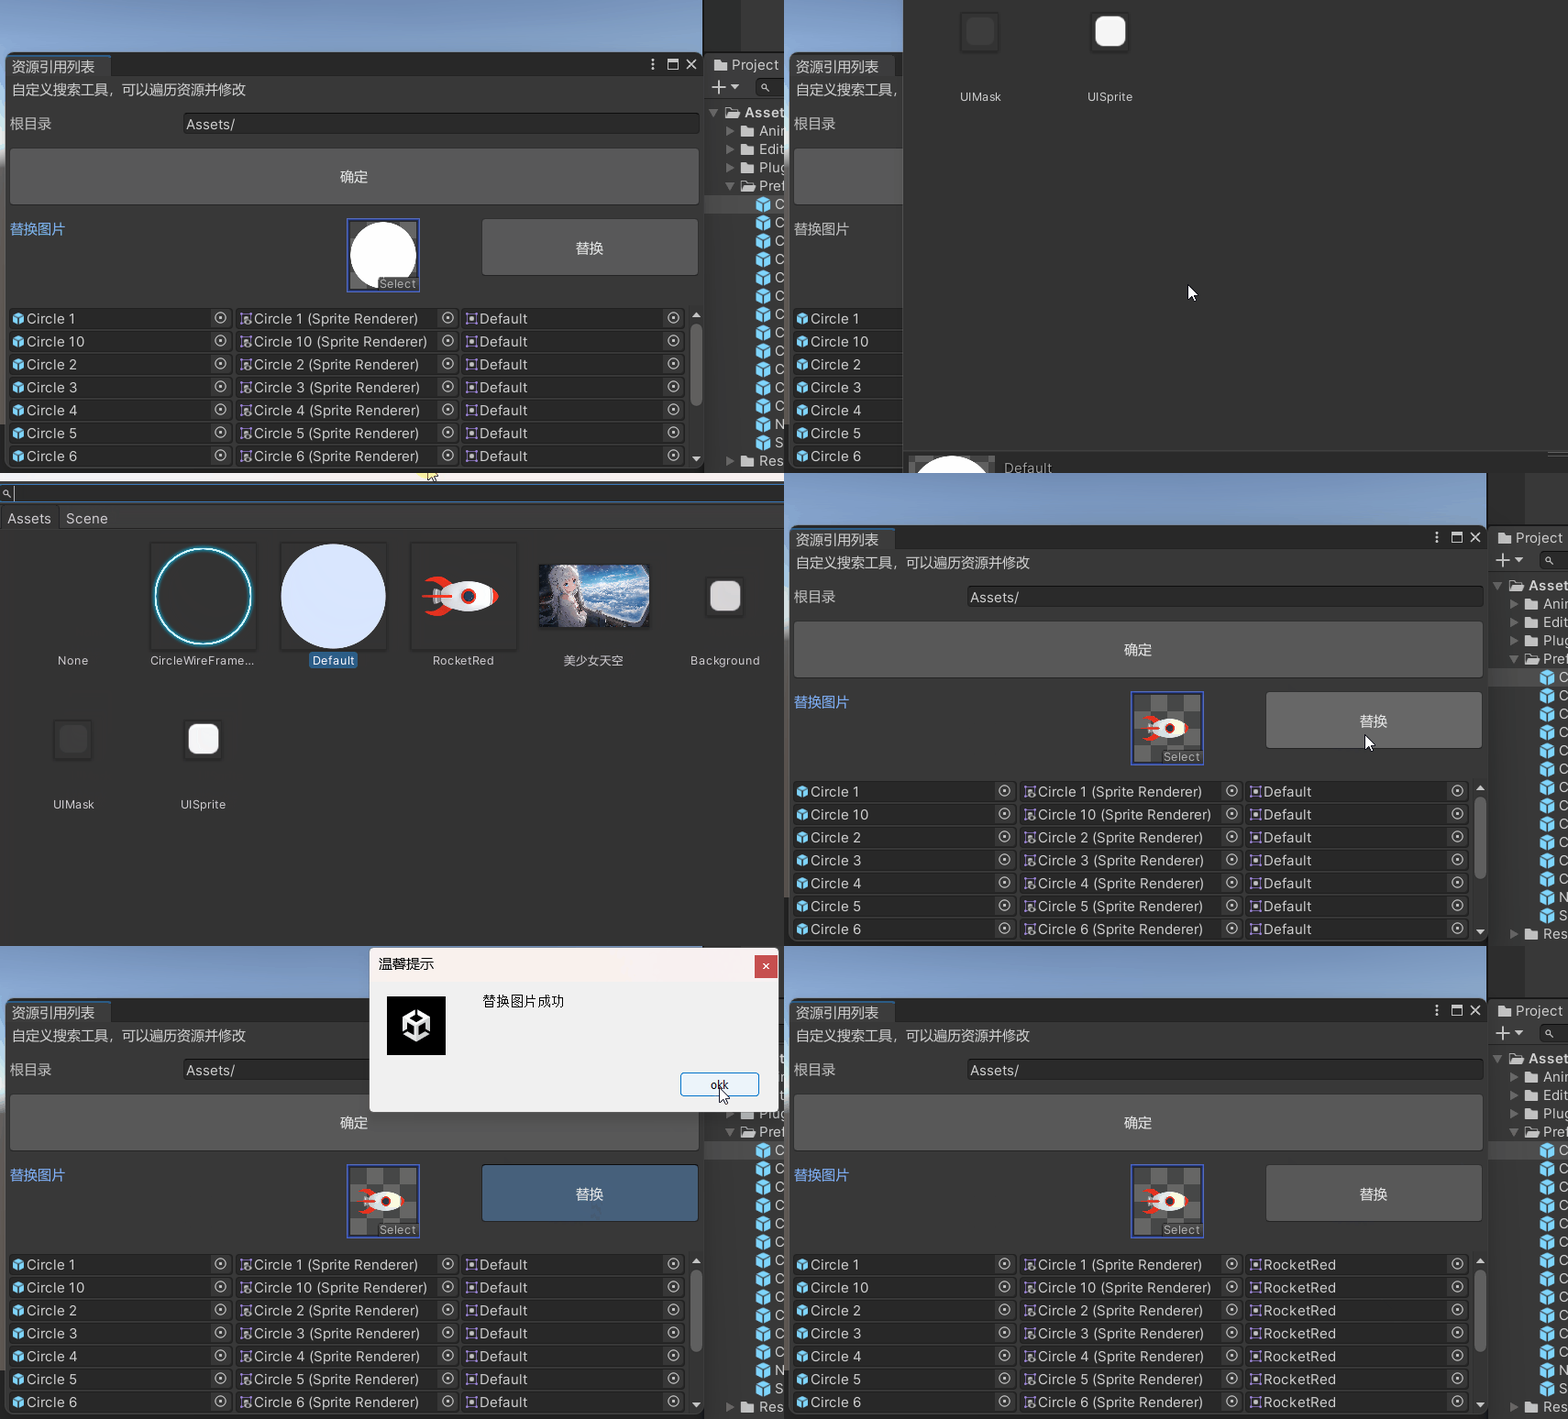
Unity3D 窗口绘制资源引用列表。
资源引用列表
我们可以在自定义窗口上绘制一个资源引用列表,筛选资源,点击引用,快速定位到资源文件夹的某个资源。
关于自定义窗口的基本实现,可以参考之前的文章《Unity3D 自定义窗口》。
获取资源引用
在 Editor 文件夹中,创建脚本 ResourceReference.cs。
参考之前的文章《Unity3D 遍历预制体》,遍历 Assets 文件夹下的预制体,获取一些资源引用,存储到 objects 列表中。
1
2
3
4
5
6
7
8
9
10
11
12
13
14
15
16
17
18
19
20
21
22
23
24
25
26
27
28
29
30
31
32
33
34
35
36
37
38
39
40
41
42
43
44
45
46
47
48
49
50
51
52
53
54
55
56
| using System.Collections;
using System.Collections.Generic;
using System.IO;
using UnityEngine;
using UnityEditor;
public class ResourceReference : EditorWindow
{
public static string path = "Assets/";
public static List<Object> objects = new List<Object>();
[MenuItem("搜索工具/资源引用列表")]
public static void OpenWindow()
{
ResourceReference window = GetWindow<ResourceReference>();
window.titleContent = new GUIContent("资源引用列表");
window.Show();
}
void OnGUI()
{
GUILayout.Label("自定义搜索工具,可以遍历资源并修改");
GUILayout.Space(10);
path = EditorGUILayout.TextField("根目录", path);
GUILayout.Space(10);
if (GUILayout.Button("确定", GUILayout.Height(50)))
{
objects.Clear();
TraversePrefab();
}
}
public static void TraversePrefab()
{
var allfiles = Directory.GetFiles(path, "*.prefab", SearchOption.AllDirectories);
foreach (var file in allfiles)
{
GameObject go = AssetDatabase.LoadAssetAtPath<GameObject>(file);
if (go)
{
Debug.Log(go);
objects.Add(go);
}
}
}
}
|
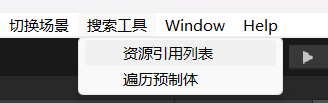
点击菜单栏按钮,打开窗口。
点击窗口内的按钮,可以看到打印的信息,此时资源已经被添加到 objects 列表中,暂时看不到。
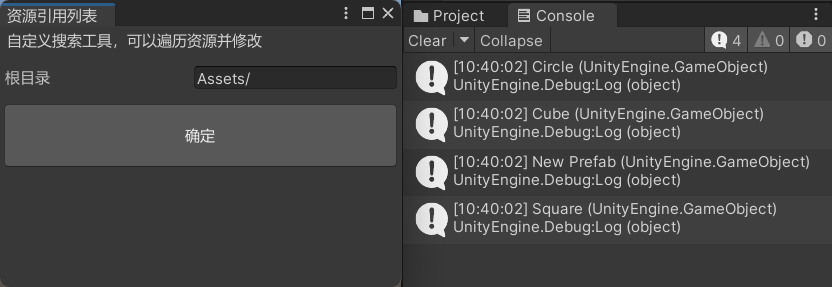
注意:每次点击按钮时,要调用 objects.Clear() 清空列表,防止重复添加。
绘制单个资源引用
使用 EditorGUILayout.ObjectField 绘制一个资源引用,传入需要显示的 object 以及它可以被赋值的类型(直接用它本身的类型 Object 即可),第三个布尔参数表示可以赋值场景中的物体。
1
2
3
4
5
6
7
8
9
10
11
12
13
14
15
16
17
18
19
20
21
22
23
24
25
26
27
28
29
30
| using System.Collections;
using System.Collections.Generic;
using System.IO;
using UnityEngine;
using UnityEditor;
public class ResourceReference : EditorWindow
{
void OnGUI()
{
GUILayout.Space(10);
DrawNode();
}
public static void DrawNode()
{
for (int i = 0; i < objects.Count; i++)
{
Object obj = objects[i];
EditorGUILayout.ObjectField(obj, obj.GetType(), true);
}
}
}
|
现在窗口里就显示了被添加到 objects 列表中的预制体资源引用,点击它们还可以快速定位到 Assets 文件夹的资源。

定义链表节点
现在列表中只能展示预制体,如果要展示预制体中的某个节点或组件,为了让视图更加清晰地展示预制体与其节点的关联性,我们可以使用链表结构。
首先,定义链表节点,每个节点包含数据、类型、指针,并提供 Add 方法,在节点尾端链接下一个节点。
1
2
3
4
5
6
7
8
9
10
11
12
13
14
15
16
17
18
19
20
21
22
23
24
25
26
|
public class Node
{
public Object data;
public string type;
public Node next;
public Node(Object data, string type)
{
this.data = data;
this.type = type;
}
public Node Add(Object data, string type)
{
Node node = new Node(data, type);
this.next = node;
return node;
}
}
|
绘制链式资源引用
修改一下 objects 列表的类型,改成 Node。
在 TraversePrefab 方法中,尝试去获取 SpriteRenderer 组件,如果存在,则生成一个 Node 节点,先把预制体 go 存入,并记录它的类型是 "prefab"。
接着,还可以使用 Node 节点的 Add 方法,继续添加它的下一个节点,把 "SpriteRenderer" 和 "sprite" 都添加到节点链接中。
在 DrawNode 方法中,使用 do while 先绘制首个节点的内容(prefab),然后获取它的下一个节点,如果存在,就继续绘制,直到没有下一个节点为止。
1
2
3
4
5
6
7
8
9
10
11
12
13
14
15
16
17
18
19
20
21
22
23
24
25
26
27
28
29
30
31
32
33
34
35
36
37
38
39
40
41
42
|
public class ResourceReference : EditorWindow
{
public static List<Node> objects = new List<Node>();
public static void TraversePrefab()
{
var allfiles = Directory.GetFiles(path, "*.prefab", SearchOption.AllDirectories);
foreach (var file in allfiles)
{
GameObject go = AssetDatabase.LoadAssetAtPath<GameObject>(file);
if (go)
{
SpriteRenderer sr = go.GetComponent<SpriteRenderer>();
if (sr)
{
Node node = new Node(go, "prefab");
node.Add(sr, "SpriteRenderer").Add(sr.sprite, "sprite");
objects.Add(node);
}
}
}
}
public static void DrawNode()
{
for (int i = 0; i < objects.Count; i++)
{
Node node = objects[i];
do
{
EditorGUILayout.ObjectField(node.data, node.data.GetType(), true);
node = node.next;
} while (node != null);
}
}
}
|
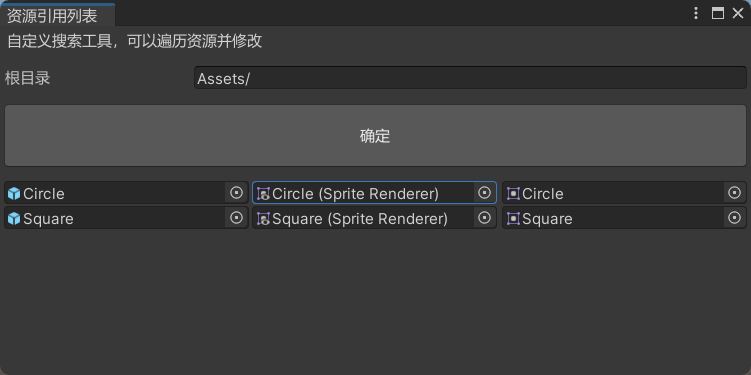
现在重新点确定按钮,可以看到列表的内容发生了改变,筛选了包含 SpriteRenderer 组件的预制体,并且把它引用的图片也展示了出来,点击 Sprite 图片也可以快速定位到资源。
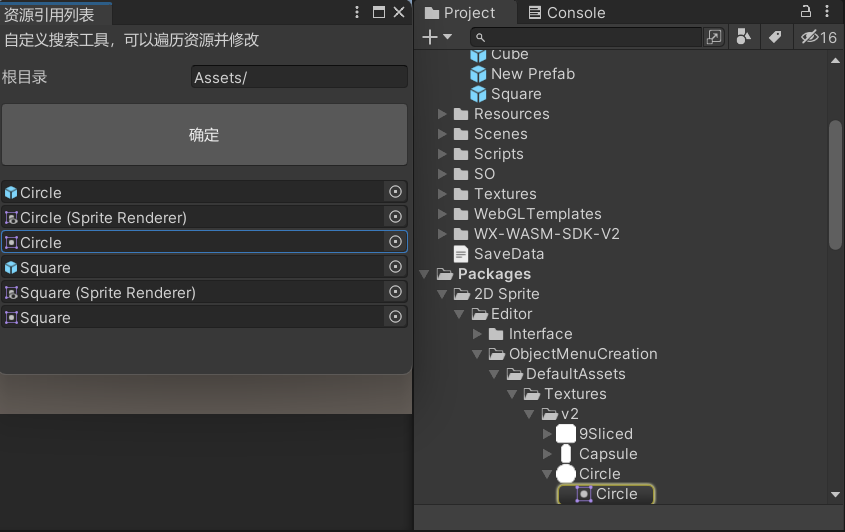
不过现在列表的内容是单列绘制的,改成三列才能很好地达到预期的效果。
只需要在 DrawNode 方法中,绘制每个 prefab 节点时,加上水平布局。
1
2
3
4
5
6
7
8
9
10
11
12
13
14
15
16
17
18
19
20
21
22
23
|
public class ResourceReference : EditorWindow
{
public static void DrawNode()
{
for (int i = 0; i < objects.Count; i++)
{
EditorGUILayout.BeginHorizontal();
Node node = objects[i];
do
{
EditorGUILayout.ObjectField(node.data, node.data.GetType(), true);
node = node.next;
} while (node != null);
EditorGUILayout.EndHorizontal();
}
}
}
|
现在列表就是三列的布局了。
绘制滚动视图
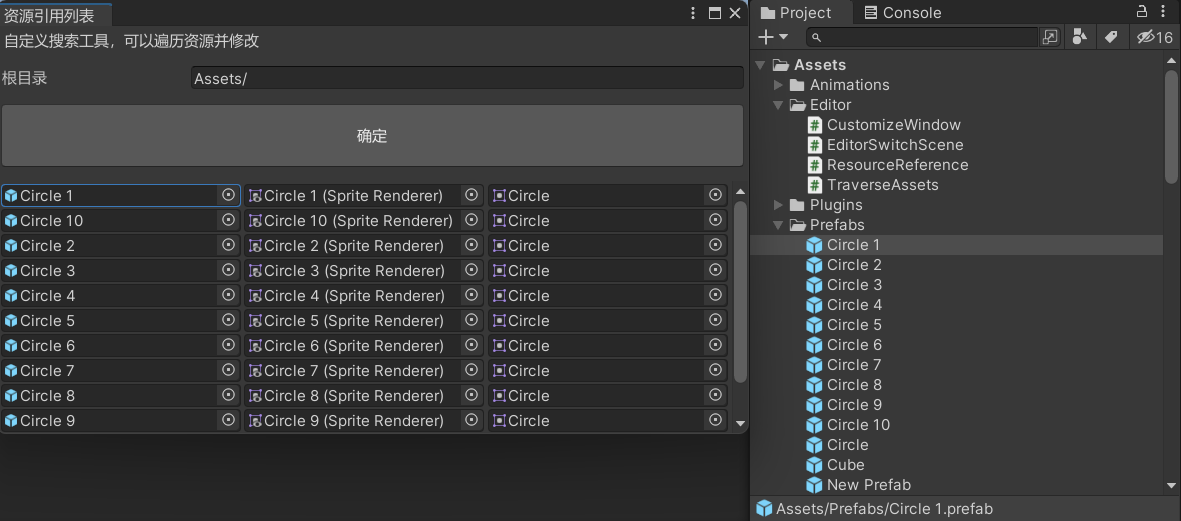
目前列表里只有两行资源引用,如果项目里有很多资源的话,就需要使用滚动视图来展示。
先定义一个 Vector2 scrollPos 记录滚动视图当前的位置。
然后在 DrawNode 方法前后添加滚动视图代码。
1
2
3
4
5
6
7
8
9
10
11
12
13
14
15
16
17
18
19
|
public class ResourceReference : EditorWindow
{
Vector2 scrollPos = Vector2.zero;
void OnGUI()
{
scrollPos = EditorGUILayout.BeginScrollView(scrollPos);
DrawNode();
EditorGUILayout.EndScrollView();
}
}
|
多复制几个预制体,视图就丰富起来了。
简单应用:批量替换图片
绘制图片资源引用
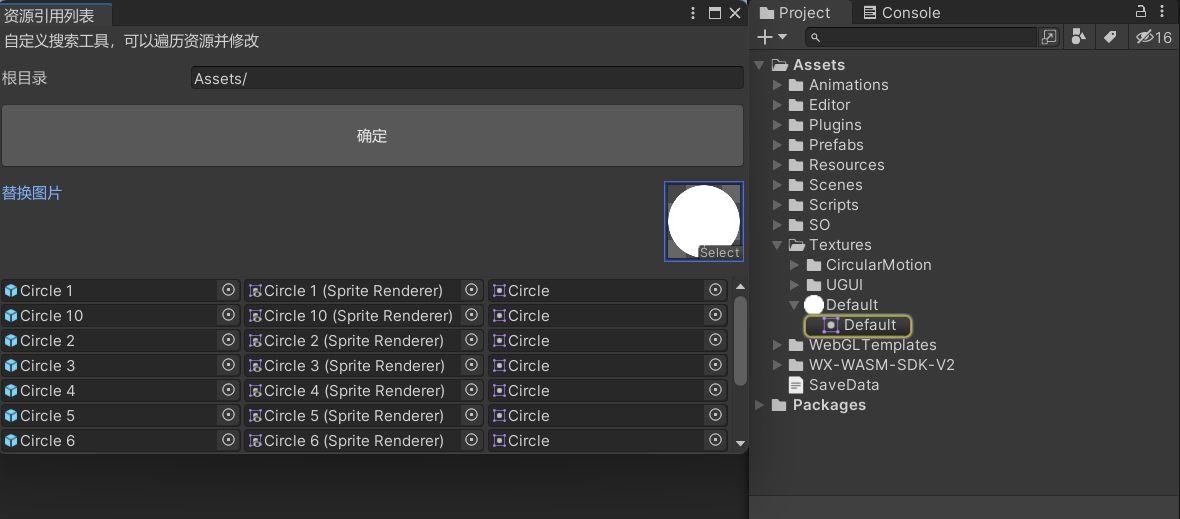
首先,在窗口上绘制一个图片资源引用,可以手动选择要替换成哪张图片。
需要定义一个 Sprite replaceSprite 变量,在 OnFocus 方法中,加载一张默认的图片进行赋值。
在 OnGUI 方法中,判断 replaceSprite 是否为空,然后再进行绘制,末尾加上 as Sprite 把 Object 类型转换成 Sprite。
注意:如果传入 EditorGUILayout.ObjectField 的对象未赋值,窗口绘制时会报错,在 OnFocus 方法中进行赋值,每次聚焦到窗口时就能保证 replaceSprite 不为空。
1
2
3
4
5
6
7
8
9
10
11
12
13
14
15
16
17
18
19
20
21
22
23
24
25
26
27
28
29
30
31
32
33
|
public class ResourceReference : EditorWindow
{
public static Sprite replaceSprite;
void OnFocus()
{
if (replaceSprite == null)
{
replaceSprite = AssetDatabase.LoadAssetAtPath<Sprite>("Assets/Textures/Default.png");
}
}
void OnGUI()
{
GUILayout.Space(10);
if (replaceSprite != null)
{
replaceSprite = EditorGUILayout.ObjectField("替换图片", replaceSprite,
replaceSprite.GetType(), true) as Sprite;
}
GUILayout.Space(10);
}
}
|
现在窗口里就出现了一张默认的替换图片,点击图片还可以打开图片选择窗口,自由选择其他图片。
替换图片
首先,绘制一个替换按钮,把图片资源引用和替换按钮放在一个水平布局中。
替换按钮调用 ReplaceSprite 方法。
1
2
3
4
5
6
7
8
9
10
11
12
13
14
15
16
17
18
19
20
21
22
23
24
25
26
27
28
29
30
31
32
33
34
|
public class ResourceReference : EditorWindow
{
void OnGUI()
{
GUILayout.Space(10);
EditorGUILayout.BeginHorizontal();
if (replaceSprite != null)
{
replaceSprite = EditorGUILayout.ObjectField("替换图片", replaceSprite,
replaceSprite.GetType(), true) as Sprite;
}
GUILayout.Space(50);
if (GUILayout.Button("替换", GUILayout.Height(50)))
{
ReplaceSprite();
}
EditorGUILayout.EndHorizontal();
GUILayout.Space(10);
}
}
|
接着实现 ReplaceSprite 方法。
可以先判断一下 replaceSprite 和 objects 列表是否为空,如果为空,就弹窗提示。
然后遍历 objects 列表,先取出 prefab 数据,在 do while 中查找 "SpriteRenderer" 类型的数据,修改它的 sprite 属性,同时修改 "sprite" 类型的数据,让窗口列表的第三列数据能够刷新。
完成图片替换后,使用 PrefabUtility.SavePrefabAsset 保存预先取出的 prefab 数据,让 Assets 文件夹中的预制体资源同步修改,然后使用 AssetDatabase.Refresh 刷新 Assets 文件夹。
最后可以给一个弹窗提示,表示已经完成了图片的替换。
1
2
3
4
5
6
7
8
9
10
11
12
13
14
15
16
17
18
19
20
21
22
23
24
25
26
27
28
29
30
31
32
33
34
35
36
37
38
39
40
41
42
43
44
45
46
|
public class ResourceReference : EditorWindow
{
public static void ReplaceSprite()
{
if (replaceSprite == null)
{
EditorUtility.DisplayDialog("温馨提示", "替换图片为空", "okk");
return;
}
if (objects.Count == 0)
{
EditorUtility.DisplayDialog("温馨提示", "节点列表为空", "okk");
return;
}
for (int i = 0; i < objects.Count; i++)
{
Node node = objects[i];
GameObject prefab = node.data as GameObject;
do
{
if (node.type == "SpriteRenderer")
{
SpriteRenderer sr = node.data as SpriteRenderer;
sr.sprite = replaceSprite;
}
else if (node.type == "sprite")
{
node.data = replaceSprite;
}
node = node.next;
} while (node != null);
PrefabUtility.SavePrefabAsset(prefab);
}
AssetDatabase.Refresh();
EditorUtility.DisplayDialog("温馨提示", "替换图片成功", "okk");
}
}
|
替换图片演示: